Using The Lua Script

Now that you have flashed your TX it is time to learn how to use the ELRS Lua script!
Installing the Lua Script
Download the ELRSv3 Lua Script (you can simply right-click, save-as) into your radio's SD Card under the Scripts/Tools folder and Long Press the "SYS" button (for T16 or similar Radios) or the "Menu" button (for Taranis X9D or similar Radios) to access the Tools Menu where you can find the ExpressLRS script ready to run with only one click.
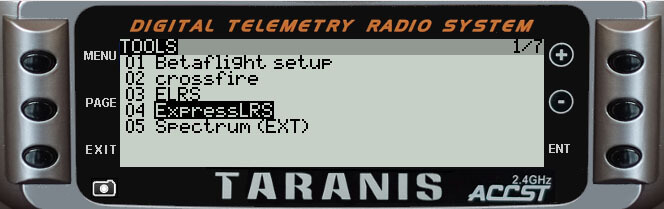
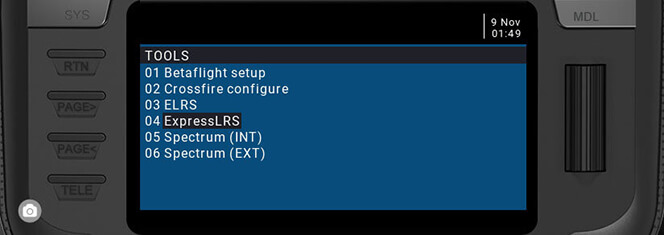
Here's how it looks in the Tools menu (X9D+ and T16 Shown):
Check if your TX is Connected
Enter the Lua script by selecting "ExpressLRS" in the Tools menu and pressing ENTER.
If the parameter list does not populate after a few seconds, and it's stuck at Loading..., first verify the ExpressLRS module has power by checking its LED. If there is no LED lit up, it is possible the Protocol set for the External Module is incorrect (should be set to CRSF) or that the module is not properly connected to the pins of the JR bay of the radio. Another possible reason is that you haven't updated the firmware of the module to version 2.x.
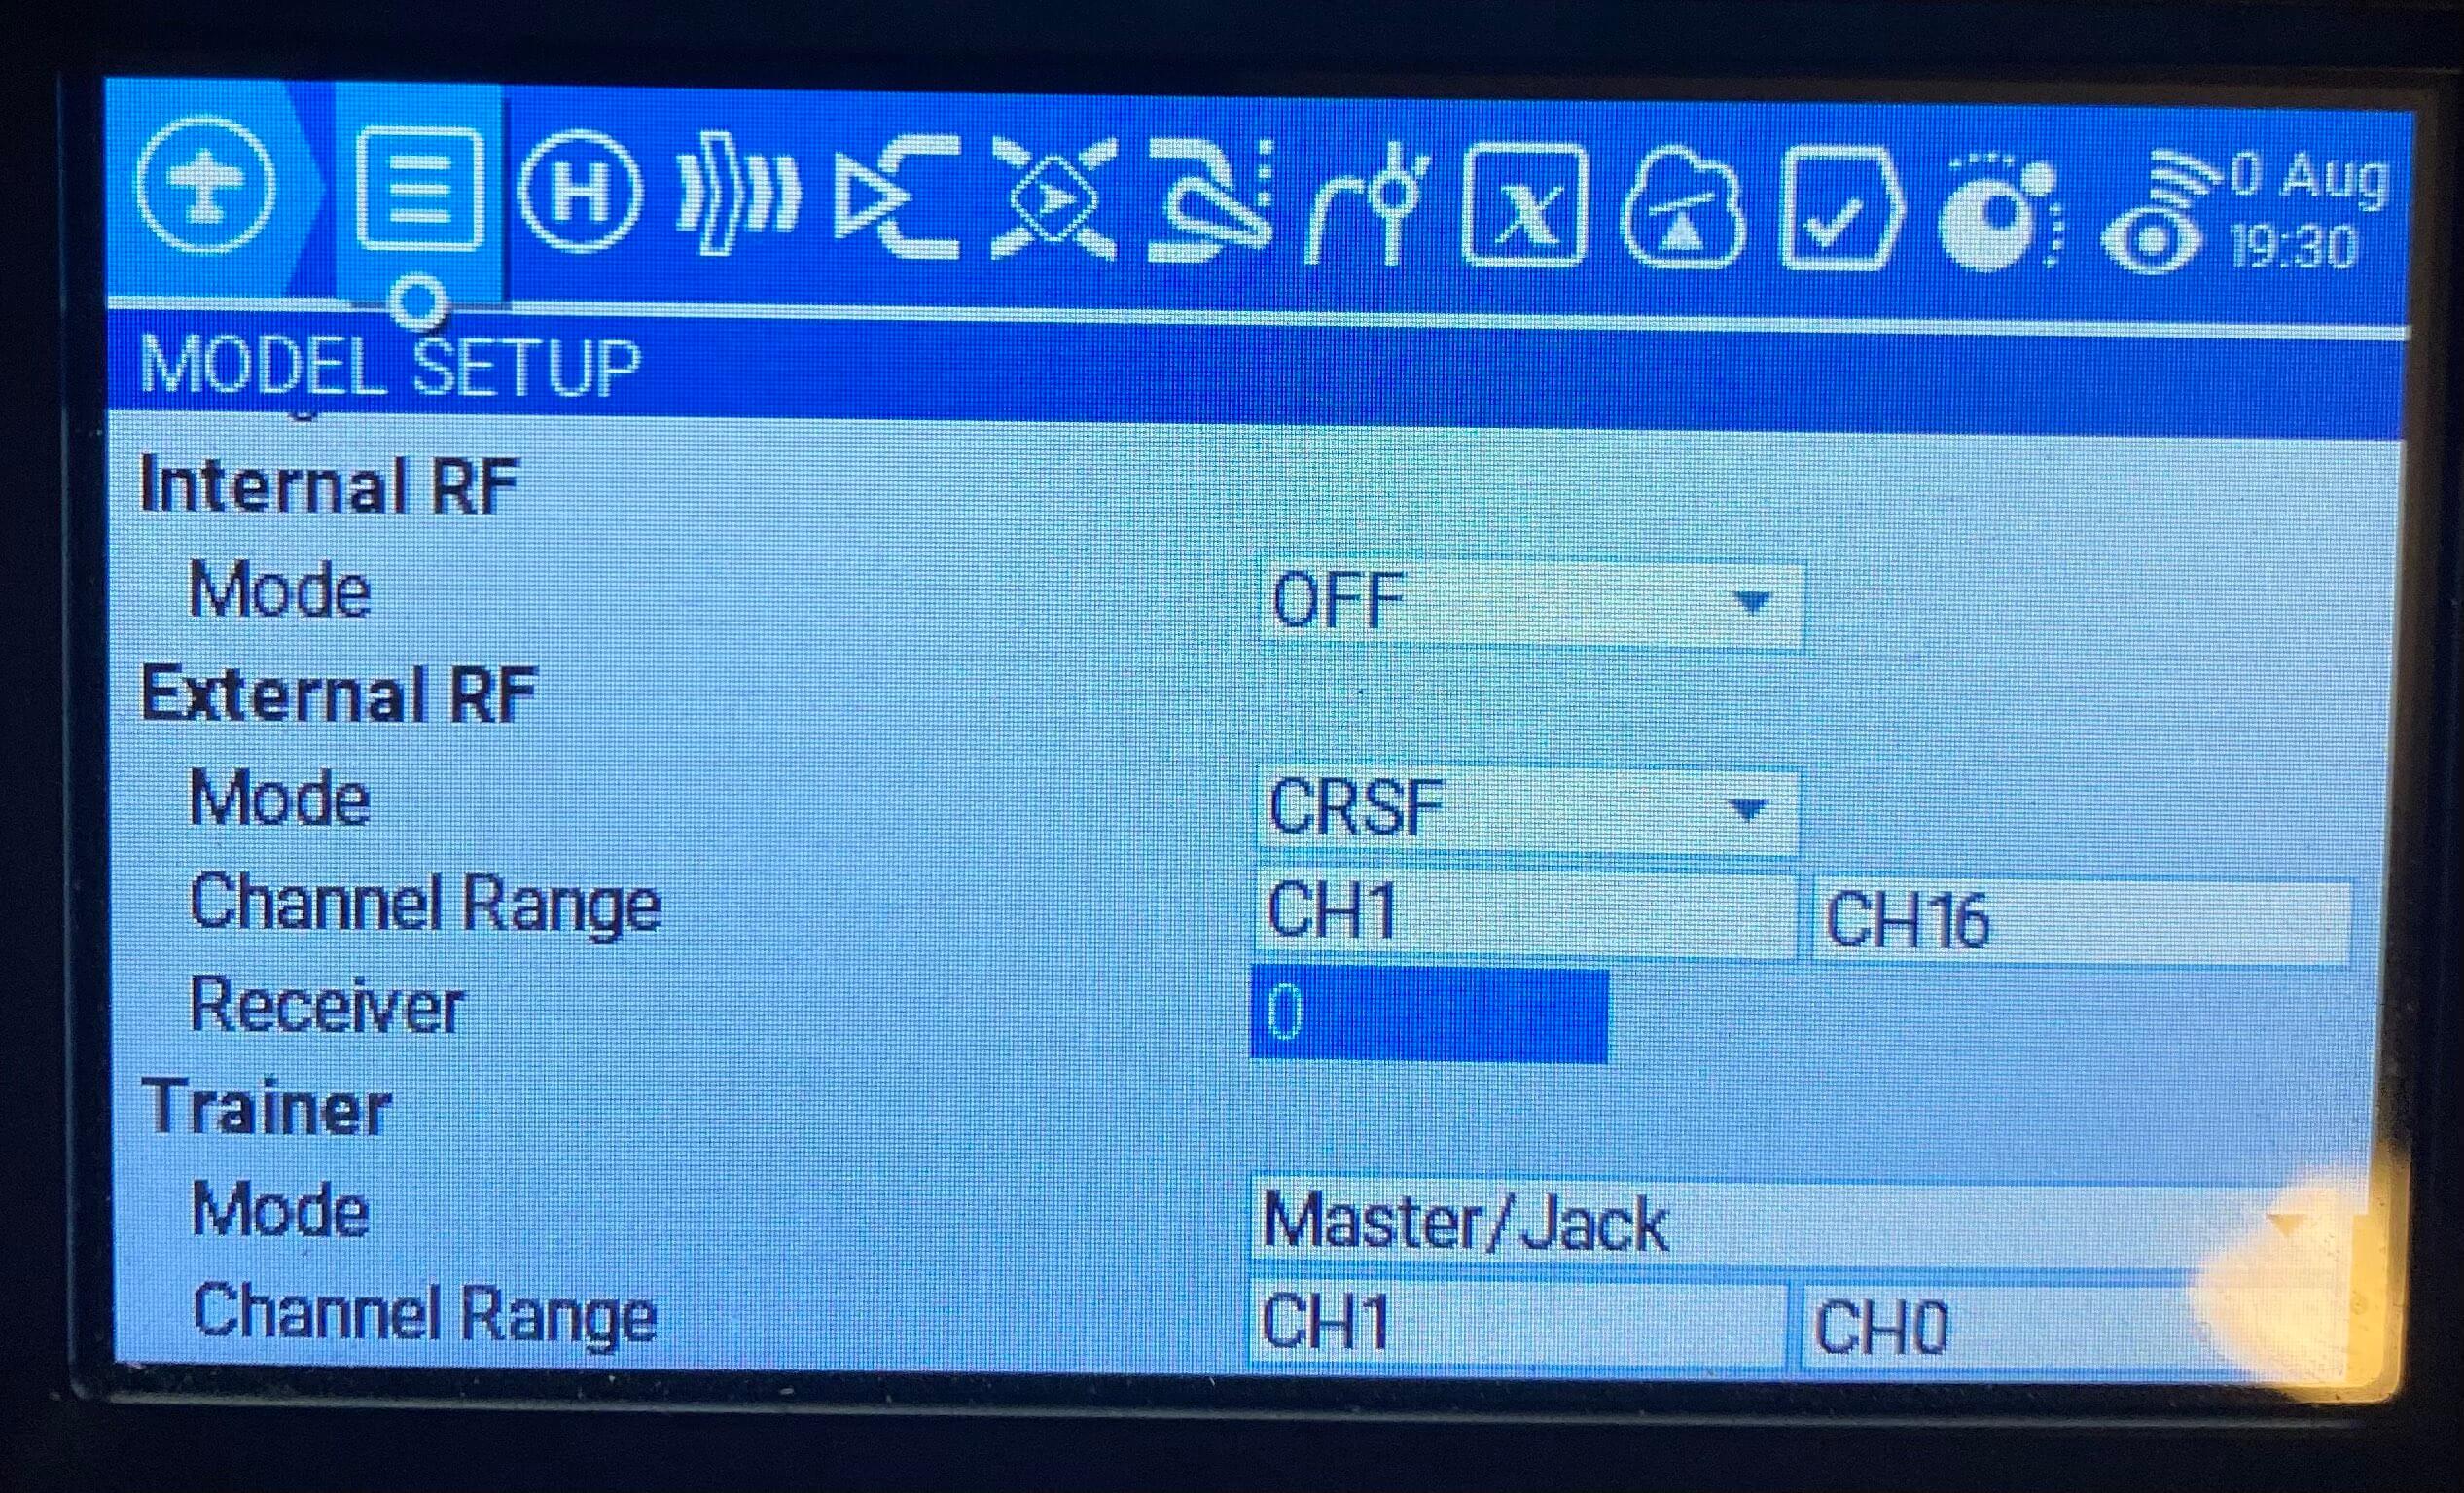
If parameters do show up, but the Bad/Good section on the right side of the header is showing an unstable value, have a look at your model settings and make sure the Internal RF module is set to Off. If the Bad/Good indicates something other than 0/<your selected packet rate> this means CRSFshot is not working-- verify that you properly followed the Radio Preparation Guide.
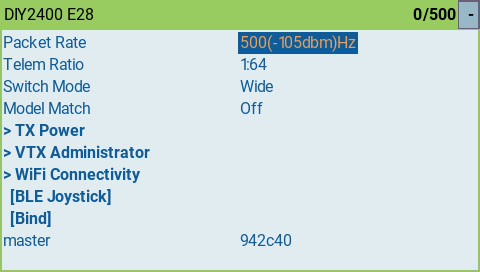

The master 942c40 from the photo above is the git branch and commit hash of the firmware version that the module has. You can reference this hash from Releases. In the first photo above, master means the module is flashed with the Master Branch with the git commit 942c40. If you're on a Released version or a Release Candidate, this will read something like 3.0 or 3.0-RC1 plus the commit hash of the release.
Note
Colors may differ from Handset to Handset, depending on the current theme in use.
Understanding and using the Lua Script
Now, we can explore the complexities of the Lua script, and how to interpret each of its many sections. ExpressLRS supports multiple configuration profiles, and the configuration profile is selected by setting the "Receiver" property in handset Model Setup -> External Module -> Receiver (number).
WARNING
Do not change parameters while ARMED. When a parameter is changed, the module goes into Parameter Commit mode, interrupting the normal loop. This could result in a desync on some hardware combination which would result in a FAILSAFE.
The Header
The first line, "Header", will show you some information about your ExpressLRS link.
The first part will show you the current ExpressLRS TX Module ID, followed by the current status of the link.
The 0/nnn is your Packet Counter. The second set of numbers should match your currently selected Packet Rate. e.g. If you've set your Packet Rate to 500Hz, the Packet Counter should show 0/500, which means you're not getting any Bad Packets ( 0 Bad Packets ) and only getting Good Packets ( 500 Good Packets ). Any small fluctuation is normal and often goes back to 100% Good Packets, especially when you change a setting and it's committed into memory.
Should the indicator starts showing Bad Packets, and Good Packets goes down, it isn't a good situation. Make sure your module is not overheating and it's still getting a good connection with the radio. This is most dangerous when you're armed and flying several kilometers/miles out, as this could mean a sudden Failsafe.
The Connection Status indicator shows your current RC link status. When not connected to any receiver, it will show a dash (-); while a C shows up when bound and connected.
The Model Mismatched message will also show up to indicate you are connected to a receiver, but the model selected on your radio is incorrect. See the Model Match page for more info about Model Matching.
Folder Titles
Items with > before the name is a folder that when selected shows another level of customization. TX Power, VTX Administrator, Wifi Connectivity are examples of these items.
 These items will now show what is currently set for the items within. An example would be on
 TX Power, which will show the current Power set, and if Dynamic Power is enabled, it will show the current set Max Power, followed by the indicator Dyn.
Packet Rate and Telemetry Ratio
These are shown as Packet Rate and Telem Ratio in the Lua script, which allows you to change your performance parameters.
-
Packet Ratesets how fast data packets are sent, higher rates send packets more frequently and have lower latency.The following options are available for
2.4GHz:50Hz, 150Hz, 250Hz & 500Hz: Lora-based options. Higher means lower latency at the expense of sensitivity. Since v1.0.F500 & F1000 : Pure FLRC for lowest latency, reduced range compared to LoRa, 500Hz and 1000Hz. DetailsD250 & D500 : Redundant transmit FLRC modes. Dstands forDéjà Vu, 250Hz and 500Hz. Higher latency, reduced packet jitter and higher LQ. Same range as other FLRC modes. Details100Hz Full & 333Hz Full : Lora-based 10-bit Full Resolution with 8ch/12ch/16 Switch Mode options. Details
The following options are available for
900MHz:25Hz, 50Hz, 100Hz & 200Hz: LoRa-based options. Higher means lower latency at the expense of sensitivity. Since v1.0.100Hz Full : Lora-based 10-bit Full Resolution with 8ch/12ch/16 Switch Mode options. Details
The number following the rate in parentheses (e.g. -105dBm for 500Hz) is the Sensitivity Limit for the rate, the lowest RSSI where packets will still be received. See Signal Health for more information about the sensitivity limit.
WARNING
Never change the packet rate while flying as this FORCES A DISCONNECT between the TX and RX.
-
Telem Ratiosets the telemetry ratio or how much of the packet rate is used to send telemetry. The options, in order of increasing telemetry rate, are:Off, 1:128, 1:64, 1:32, 1:16, 1:8, 1:4, 1:2. A Telem Ratio of 1:64 means one out of every 64 packets are used for telemetry data.- v3.0 comes with
StdandRaceoptions.Stdchanges ratio depending on the Packet Rate, andRaceis the same as Std, but will disable telemetry and sync while Armed.
For information on telemetry setup, see First Flight: Telemetry and Telemetry Bandwidth.
Switch Mode
The Switch Mode setting controls how channels AUX1-AUX8 are sent to the receiver (the 4 main channels are always 10-bit). The options are Hybrid & Wide. Hybrid mode is 6x 2, 3 or 6-position + 1x 16-position, and Wide is 7x 64 or 128-position. For detail about the differences, see the Switch Configs documentation.
In full resolution modes, the Switch Mode parameter selects the number of channels to be used. Full Resolution Switch Modes
Hot Tip
The Switch Mode can only be changed when not connected to a receiver. The top right corner of the Lua script will show a - if you're not connected.
Model Match
Model Match is used to prevent accidentally selecting the wrong model in the handset and flying with an unexpected handset or ELRS configuration. Setting this to On while a receiver is connected will make that receiver only connect with the current Receiver ID. Setting it to Off will allow a connection with any bound receiver (including those using a Bind Phrase). Both sides of the connection must agree on their Model Match setting. For a detailed explanation of how this restricts connections see Model Match. The current Receiver ID is shown after the option value.
TX Power
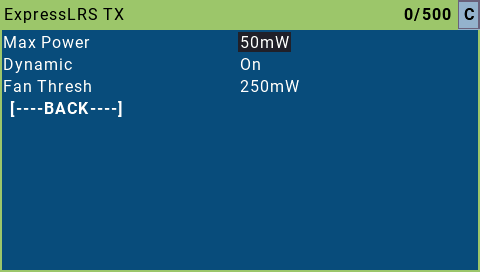
TX Power is a folder, press ENTER to enter the TX Power settings and use RTN/EXIT to exit the folder.
-
Max Powersets the maximum power level your TX will transmit at. Selecting a power level higher or lower than your TX supports will revert to the closest supported level. The options are10, 25, 50, 100, 250, 500, 1000 & 2000mW. If Dynamic Power is set toOffthis is the power level your TX always uses. -
Dynamicenables the Dynamic Power feature.Offmeans that the TX will transmit at Max Power at all times.Dynmeans the TX will dynamically lower power to save energy when maximum power is not needed. The optionsAUX9, AUX10, AUX11, AUX12indicate that the TX can be changed from max power to dynamic power by changing the position of a switch. where switch HIGH (>1500us) = dynamic power, switch LOW (<1500us) = max power. For more information, Dynamic Transmit Power provides a deeper dive into the algorithm and usage. -
Fan Threshsets the power level the Fan should activate, e.g. if set to 100mW, then the fan should spin up if you setMax Powerto 100mW withDynamicset to OFF after a short delay. The fan will continue running for some time even after the power level goes below the threshold. Not all modules have a Fan header that benefits from the setting. . Default fan threshold is 250mW.
VTX Administrator
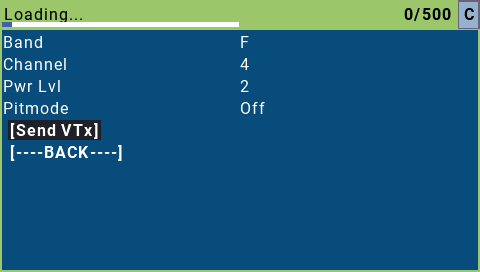
VTX Administrator allows you to change your VTX settings directly from your radio, and have those VTX settings be applied to any receiver you connect to. The VTX settings are sent every time a new connection is acquired, or when [Send VTX] is pressed.
Hot Tip
VTX Administrator will send the current VTX settings to the flight controller whenever the TX module detects a connection to the RX. This means that it will resend them after telemetry lost/recovered. So if you have used any other method to change the VTX power level (i.e. OSD), then that will be overridden if you lose/regain telemetry in flight.
-
Bandsets the VTX band, the options areOff, A, B, E, F, R & L, the standard analog FPV bands.Offmeans that VTX Administrator will not adjust any VTX settings. -
Channelsets the VTX channel, the options are1, 2, 3, 4, 5, 6, 7 & 8which are the standard channels in the above bands. -
Pwr Lvlsets the VTX power by index, the options are-, 1, 2, 3, 4, 5, 6, 7, & 8which are the power levels that your VTX can do. Refer to your VTX table settings on the flight controller for the exact power levels. For example a VTX may have 1 = 25mW, 2 = 100mwW, 3 = 200mW, 4 = 500mW. -
Pitmodethe options areOn & Offwhich allow you to quickly switch into or out of pitmode -
Finally pressing the
[Send VTX]button sends the configured settings to the receiver and on to the VTX. These settings are also sent every time a connection is established.
WiFi Connectivity
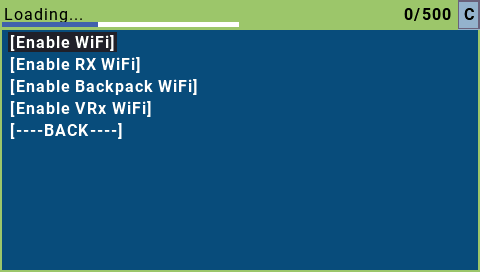
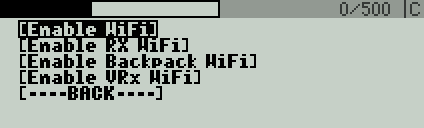
This section contains all the WiFi-related functions.
-
Enable WiFiwill activate the Tx module WiFi mode for updating via WiFi (if the Tx Module has WiFi Capabilities). Visit this page for instructions on how the updating process works. -
Enable Rx WiFiwill put the bound and connected receiver into WiFi mode to facilitate updating via WiFi (if the receiver has WiFi capabilities). -
Enable Backpack WiFiwill put the Tx Backpack into WiFi mode (available only to TX modules with backpacks connected and updated to the new Backpack firmwares). -
Enable VRx WiFiwill put the VRx Backpack that is bound and connected to the onboard TX Backpack into WiFi mode to facilitate updating via WiFi.
Bind
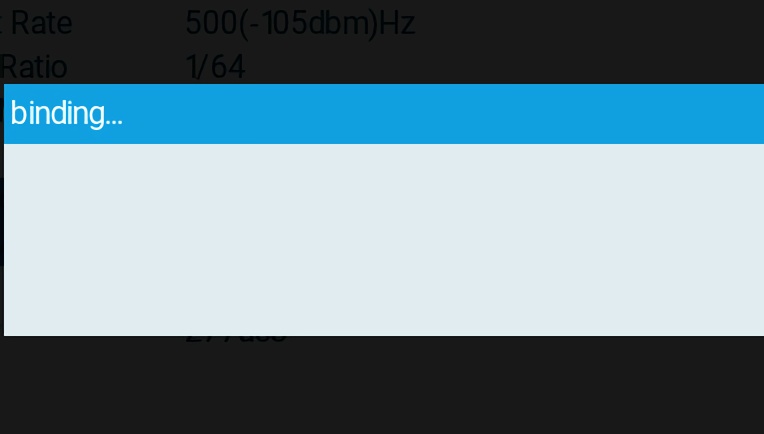
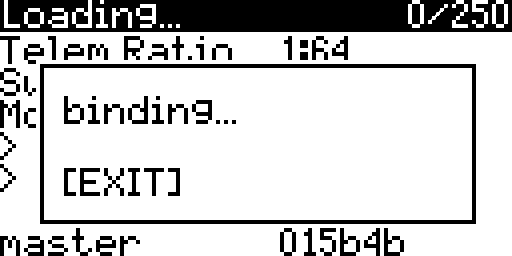
Pressing the [Bind] button activates the binding mode for traditional binding. This does nothing for users who have configured a bind phrase and is not needed. For more information check out this page on binding.
BLE Joystick (ESP32 TXes Only)
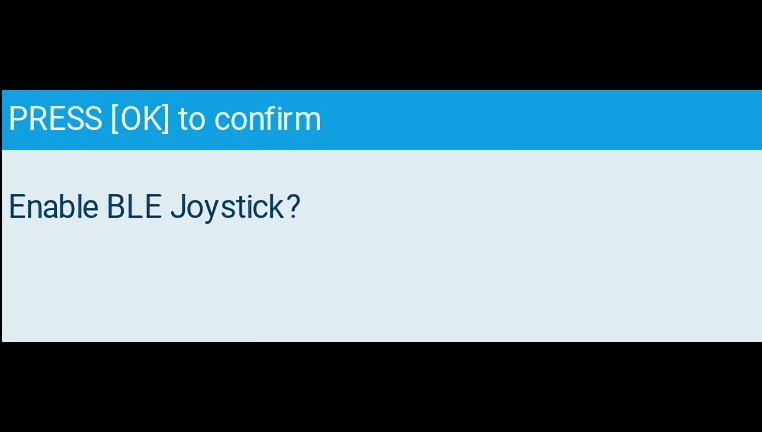
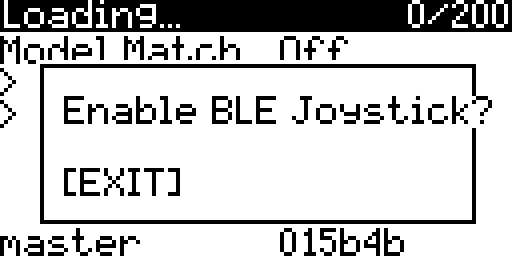
Pressing the [BLE Joystick] selection activates BluetoothLE Joystick mode which allows connection to simulators through the bluetooth of your computer. Reboot or change models to exit this mode.
Other Devices
The Other Devices folder, if present, allows changing the configuration of other connected devices, such as the current receiver. Within this folder there are options such as Init Rate, Telemetry Power, Diversity Mode & the Loan Model features. The Init Rate setting lets you set which packet rate it starts from when cycling through rates looking for a TX, this is particularly helpful when using lower packet rates where it might take some time for the receiver to get around to your chosen rate.
Recommendations
-
For racing where maximum performance is a must, the
500Hzmodes or faster, with theRaceTelemetry mode, is ideal.HybridSwitch Mode is also good here. -
For freestyle and general everyday flying, you may use the
250Hzmodes or faster, with theStdTelemetry mode. Switch Mode doesn't matter as much here. Select what's appropriate for your Flight Mode settings. -
For fixed wings, we recommend using
100Hz Full Res, together with eitherStdor your choice of Telemetry Ratio. Switch Mode will depend greatly on how many full resolution channels you intend to use.
Troubleshooting the Lua Script
ExpressLRS Lua Script is stuck at Loading...
ExpressLRS Lua Script is stuck at Loading...
Go back to the Radio Setup Guide and make sure your radio is prepped up for ExpressLRS. Check that the ExpressLRS Tx module is enabled - otherwise the script cannot be loaded.
Also, make sure your module has been flashed with v3.0 firmware. V3 Lua for V3.0-flashed modules, V2 Lua for v2.x-flashed modules (including some modules fresh from the factory).
For newly-acquired ExpressLRS modules, flashing via USB is the recommended update method.
I cannot change the Switch Mode!
I cannot change the Switch Mode!
Changing switch modes requires that the TX module and Receiver aren't connected to each other (no C in the top right corner of the Lua Script). Power off the receiver first, change the Switch Mode from the Lua script, then power up the receiver. The Switch Mode should then apply.
I cannot change my Packet Rate to F1000!
I cannot change my Packet Rate to F1000!
F1000 requires higher than 400K baud rates. First update your baud rate setting either in the Model Setup menu or in the System Menu -> Hardware, reboot your radio to ensure that the baud rate setting got applied and then change the Packet Rate.
Do note that not every handset is capable of higher than 400K baud rates. See the Radio Setup Guide for the details.
I cannot change to Full Resolution Rates!
I cannot change to Full Resolution Rates!
As Full Resolution Rates call for an entirely different Switch Modes, you need to first disconnect the Receiver and the TX module from each other, like how you would change Switch Modes. Power down the receiver, change the Packet Rate to the Full Resolution modes, select your Switch Mode scheme and then power up the receiver or the aircraft.
VTX Admin is not working but I can change VTX channels via OSD Menu.
VTX Admin is not working but I can change VTX channels via OSD Menu.
As VTX Admin depends on MSP which then depends on Telemetry, ensure that you have Telemetry enabled on your FC Configuration and that you are getting more than 10 Telemetry Sensors on your Radio (Model Setup -> Telemetry page; Delete and Discover New sensors to refresh the sensor list.) Also, make sure Telem Ratio is not Off.
There is no C on the top right corner, and I'm not getting Telemetry in my radio!
There is no C on the top right corner, and I'm not getting Telemetry in my radio!
Make sure Telem Ratio is not set to Off. Set it to Std, or any other value other than Off.
On v1.x, I can choose 2W on the Lua, but I cannot do that anymore. What gives?
On v1.x, I can choose 2W on the Lua, but I cannot do that anymore. What gives?
This means your module cannot go that high or that low. The power levels you can select on the new Lua script are based on the power levels your module supports. This also applies to other options like Enable Backpack WiFi or BLE Joystick. If your module doesn't support any of these features, it won't show up on the Lua Script.